
So to start here's what I've got to play with -

Started by cutting up HL and Mato hulls, then thought the transmission cover didn't look right so that needed sorting.

Chopped up the transmission cover to reshape it

Then decided to give it all a cast effect (needs sanding down a bit more) also decided to go to work on the cast hull front.

Got the two hull parts joined together. They are slightly different heights so I lined up the top of turret rings and I'll make up the difference with plasticard (the HL hull is a little shorter). Cut out the engine deck so I can swap it with the Mato one.

And the postman dropped these off.
I wasn't sure about getting these but I'm so glad I did. 
The Firefly Hybrid was made with a M4 Hull (welded) with the front off
the M4a1 (cast). Looking at this diagram I noticed that the Henglong
M4a3 hull (Late 47) is slopped more at the back*. So thats for the chop
(wish I'd spotted this before I stuck them together.)

After much googleing I've found that the M4 rear slopes at 10 degrees to the vertical and the M4a3 can be 10 or 22 degrees. The HL model is 20 degrees so look like it's chopping time.
Need to chop this much off the back to get the right angle

Finished the cast effect on the hull

Close up

Started on the engine deck and turret-


Hinged the back so I can put the switches and vol control in there.

I got the running gear sorted out and gave it a test run-
Just got a 3D printer so I've been trying my hand at CAD, here's the muzzle brake I've been working on-

This is how it turned out-

Not too bad for someone with zero CAD experience and less then a day using a 3D printer.
Printed out the barrel and another muzzle brake (still needs a bit of finishing) and tried it for size-


Made some thinner light guards out of an old sweet tin and did a spot of Milliput welding-


Starting to look "The business"


Did more welding and added the fire extiguisher

also started on the left side

One thing that's been bugging me was the fuel cap covers

So I cut them off and printed some new ones-

job done-

Added a three piece transmission

Printed a new manlet

Finished the tools on the left and back and added a few bolts to the engine deck

Finished off the three piece transmission-

I love the Mato metal suspension but one thing that bugs me is the little spring. They just don't look right for a +30ton tank. So I decided to make some proxy springs-


A dry test fitting. The bottom cone will be glued to the base so that it stays down and will pull/push the other cones up and down as the suspension arms move. They're not perfect but they look a lot better then the springs and I don't need to modify any of the metal parts to get them to fit.
Added some detail to the air filters-


Added a new gun cover-

I got a new recoil / elevation unit with high intensity flash but it doesn't fit in the turret and the flash bulb doesn't fit in the barrel.
It just about fits in when the unit is in the recoil position and the gun is fully forward.

So I thought I could just cut a hole in the back of the turret and push the recoil unit into the radio box. Which worked great but then with the elevation unit so far back the gun only had a few degrees of elevation. So while I was trying to work out what to do about that (lots of angles and maths involved) I decided to work on a new barrel.
 The new (grey) barrel uses an 8mm tube with filler and a few printed parts (the old one was 6mm).
Also made a new bracket for the recoil unit.

After much head scratching and a few new parts I managed to get it all in and moving properly.

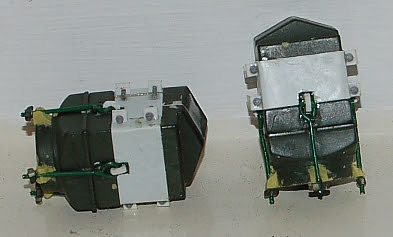
Also made a slipring bracket

Now for the flash unit and wiring.
Finished inside the turret with a flash unit bracket

Added a UK style tow hook and early exhausts

Made some welded stowage hoops


Casting numbers on the turret and transmission covers

Just a few more things then it's the electronics and painting.
Looks completely different with just the under coat

pleased with how the cast effect and serial numbers turned out


There's paint on the wheels but that'll come off when it's running around.
Just needs a few coats of varnish, some highlights then it's done (hmmm maybe a 50 cal, more stowage........)


Added some detail to the air filters-

Also changed the angle of the rear of the turret added more detail to the turret and changed the gun housing and manlet


I got a new recoil / elevation unit with high intensity flash but it doesn't fit in the turret and the flash bulb doesn't fit in the barrel.
It just about fits in when the unit is in the recoil position and the gun is fully forward.

So I thought I could just cut a hole in the back of the turret and push the recoil unit into the radio box. Which worked great but then with the elevation unit so far back the gun only had a few degrees of elevation. So while I was trying to work out what to do about that (lots of angles and maths involved) I decided to work on a new barrel.

Also made a new bracket for the recoil unit.

After much head scratching and a few new parts I managed to get it all in and moving properly.

Also made a slipring bracket
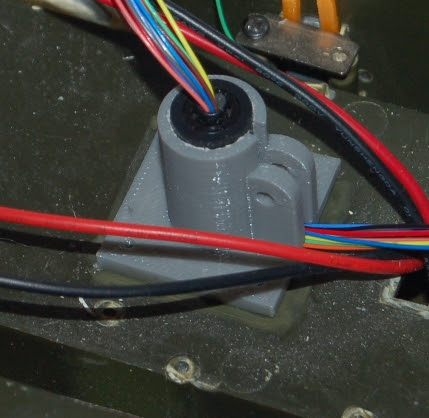
Now for the flash unit and wiring.
Finished inside the turret with a flash unit bracket

Added a UK style tow hook and early exhausts

Made some welded stowage hoops


Casting numbers on the turret and transmission covers

Just a few more things then it's the electronics and painting.
Looks completely different with just the under coat

pleased with how the cast effect and serial numbers turned out

First couple of coats-


There's paint on the wheels but that'll come off when it's running around.
Just needs a few coats of varnish, some highlights then it's done (hmmm maybe a 50 cal, more stowage........)


This is a nice Model :) the detail and the time and research for this project must have been months. although when you got to the part about the elevation not fitting in the tank i was expecting "I managed to fit it by putting it on its side, which really does show even in model form the Sherman turret turret was too small
ReplyDeleteLovely conversion. However, didn't the 1C Hybrid have a 1 piece transmission ?
ReplyDeleteHey warren, how can i contact you. Unfortanatly i didnt find a email or something. Best regards
ReplyDelete