

More after the jump
Now I've decided to convert it to a Pz IV H
Added extra armour and angled the engine deck-


Spare wheel bin
(Shapeways Link)

Filters
(Shapeways Link)

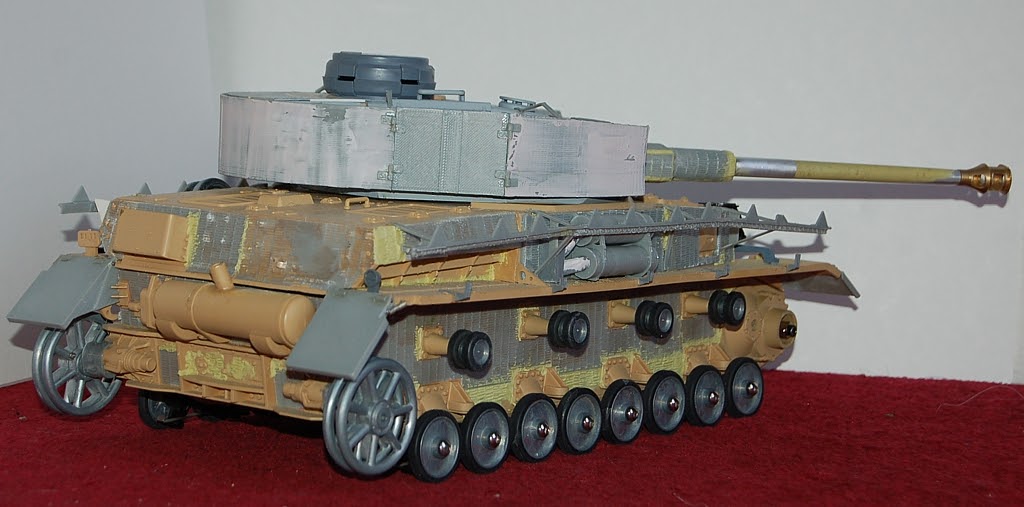
Schurzen rails and single cover commanders hatch.


With skirts (they are removable so I can take them off when I'm running the tank.)-


Re-did the Mudflaps-
(Shapeways Link)


Added the metal wheels and tracks and started on the turret. Modified the stowage bin and removed the side view ports-

Added the turret Schurzen -

Mud flap springs added and more work done on the turret-


To Zim or not to Zim. I want to put Zim on it but don't know if I can be bothered.
Changed the gun housing and manlet (still needs a bit of detail adding).

Lowered the rear idlers-

Made some ramps to raise the drive sprockets.-
(Shapeways Link)


Added bearings to the output shafts-

Made some parts that fit into the transmission covers and will hold the bearings and covers in place.
(Shapeways Link )


I noticed that the rim of the cover is worn which is worrying as I only ran the tank for a minute when I got it to make sure it worked (with the original plastic sprocket)

Looking at it the sprocket sits on the rim-

and is 2mm away from the drive shaft-

I wonder if all PzIV’s are like this?
With metal sprockets the rim would soon get worn down and I’ll have a bad case of sprocket wobble so out came the razor saw and I trimmed 3mm off-

Now the sprocket will need spacing out with a washer or two to line up
with the wheels (I’ll sort that out when I get it running).

Running gear done-

Started on the Zimmerite. Printed out a few sheets to cover the large areas then I'll do the complicated bits with milliput


Finished the Zim and added spare tracks

also repositioned the exhaust out pipe
Fitted the On Off switch-


Which is covered by this storgae box-

also opened up one of the ammo hatches so I can fit the volume switch-

It has two small magnets to keep it closed-

All done ready for painting-


With skirts-

Undercoated -


Couldn't help thinking that just one quick coat of paint and it already looks loads better.
Base layers -


Tried out the chipping on the skirts (used the hairspray method)-

Damage done -


Got some weathering done-


No comments:
Post a Comment