
I know I said no more new projects until I finished some of the ones I've already started but I almost got a good deal on a Panther. That got me thinking, with a Panther I'd have all the German Panzers that went into production during WWII apart from two (PzI and Pz II).
I went away last weekend (couldn't do any modelling) so armed with my laptop, George Bradford's "German Early War AFV's", a ruler and Google image search, I got to work on the first production Panzer. As this was going to be my first all printed tank it seemed a good idea to start on something small and easy. Over the last week in between printing parts for other people I managed to do this-


The suspension isn't quite to scale but I had to make a few changes as I wanted it to be fully working.
I made a few errors that I only spotted once printed but nothing that was easily fixed on the model (and on the CAD file). My PLA extruder failed* half way through the week so I had to use ABS. I had been thinking about using ABS for some parts (it can be tricky to use) but wasn't sure about using it to print out new parts that I'd never printed before. In the end I was forced to and I'm glad I did. The entire lower hull is in ABS and it fits perfectly with the PLA upper (had to increase the parts by 0.75% to allow for shrinkage) which is great as the ABS is stronger.
* for the 3D printer users - The PTFE tube finally gave up the ghost. Not bad as I've been printing almost every day 4 - 8 hours a day for just over a year.
Test fit the return rollers. Pictured with a Tiger 1 (another unfinished project) to show how small it is-

Hatches, exhaust and view ports done-


Got some Pz38t R/C parts and the gearboxes slotted straight in-


and came up with a way to make the suspension work -


Finished the suspension

added a towing brackets and towing hooks.


Tracks done-


Added the tools and wheel/sprocket hub's


After a quick test run I noticed the road wheels kept stopping as the tank moved (no traction with the track) so I decided to go for rubber tyres
New wheel without tyre and my printed tyre cutter -

Cutting the tyre -

Wheel with tyre-

I also simplified the suspension. How it looks now-


Ran it around for about 10 minutes and the tracks stayed on so I'm a bit chuffed. I think it needs a bit of weight adding to get the suspension to work better.
Had Shapeways print me some MG's


On/Off switch and volume control are in the side hatch

The inners-

I've added a few large metal washers (wrapped in insulation tape) to the back and front) with the top down there is no room for anything to move around.
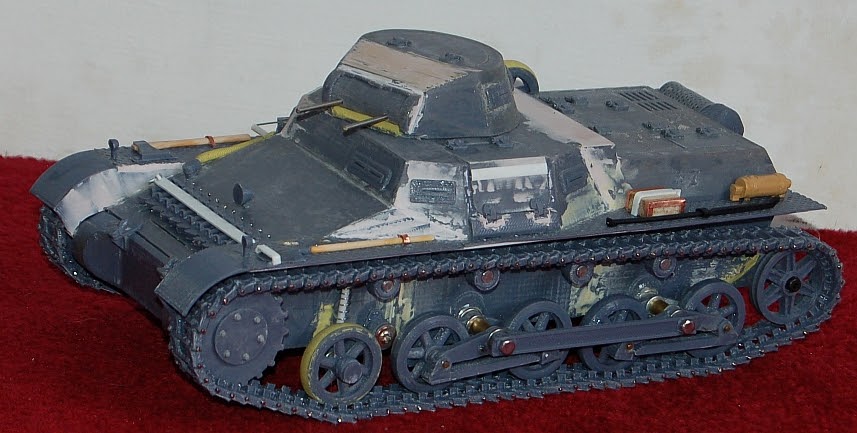
Base coats done-


The finished tank can be found here- http://warrenhudsonmodelling.blogspot.com/2015/10/116-pzkpfw-i-ausfb.html
Hi Warren,
ReplyDeleteI love to see your builds and progress photos of your 3D printed parts. I have to get myself a printer and see what I can do with it.
Keep up the great work my friend!!!
Thanks
ReplyDeleteIf you do a lot of modelling or scratch building then a 3D printer is a great tool. The printers are getting better and at the same time cheaper.
Hey Warren, I absolutely love this build! I was introduced to your work through Roger. Great stuff!
ReplyDelete"OUTSTANDING WORK "!
ReplyDeleteVery nice work! Are the models available for others to use?
ReplyDeleteThat's excellent, Woz. The photo next to the tiger really shows how small this is and how difficult it can be to get the electronics in there, but you've done a really great job. You might want to post that photo in the thread at RCU so the guys there can see just exactly how tiny these tanks are. Again, great work.
ReplyDelete